Design & Print Tips and Tricks
If you use Avery products then you will most likely know about our online template software Design & Print. However, if you don’t and you’re a beginner, here are some tips and tricks to help you get fantastic results when creating labels and stickers.
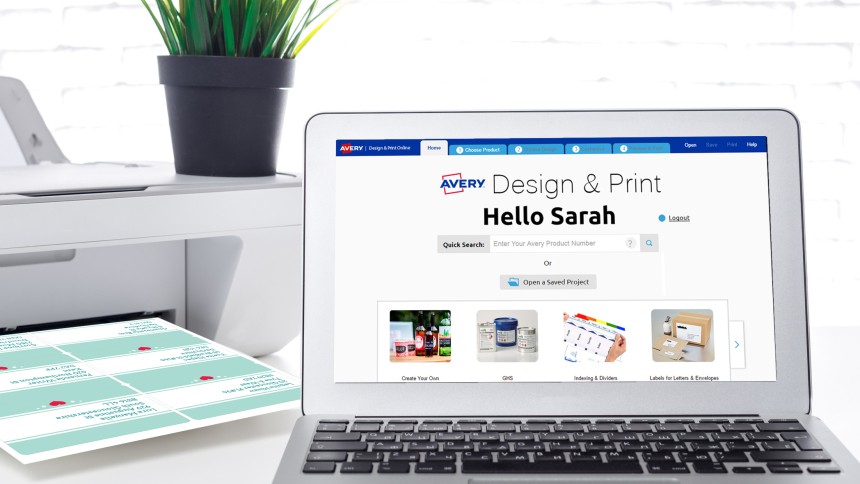
Design & Print is our free label and card-creating software. To access it, simply go to www.avery.co.uk/print and click “Start Design & Print". Next, choose your Avery product before selecting a pre designed template or create one from scratch! Design & Print allows you to add images, text, logos, QR and barcodes. It also saves you time with its powerful Mail Merge feature that allows you to import data from a spreadsheet directly onto your blank labels. We are sure that once you start using it, you will find it quick and easy to follow and that it makes printing easier too.
Adding Images
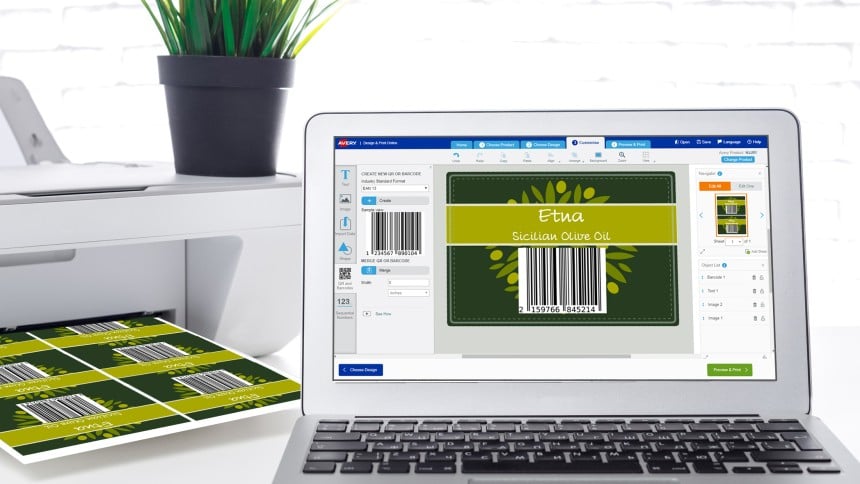
In Design & Print, you can add your own images or logo (files we support .png, .jpeg, .jpg, .bmp, .psd, .eps, .tiff, .tif, .pdf, .ai, .svg) or you can choose from our gallery which has lots of categories of images to choose from.
Adding images is easy, when on the “Customise” screen, click on the ‘add image’ button on the left hand side tool bar and either select ‘Computer’ or ‘Avery gallery. You can even import images from your social media sites if that’s where you tend to store your photos.
Background Colour
If you would like to change the colour of the background of your product, you can go to the background tool on the top bar and choose a colour or you can add a coloured shape and arrange it at the back of the design (as the bottom layer)
Tip- If your labels or cards do not touch each other on your Avery product, don’t forget you can stretch images and shapes all the way out to the dotted lines, to make sure that your design prints all the way to the edge.
When you add a shape you can change the transparency of its colour and add text and images on top of it. To lock the shape as a background, on the right hand side in the “objects” panel, click on the padlock sign beside your shape to lock it into position.
Editing Individual Labels
Our customer service team are often asked ‘how do I edit just one label without changing them all?’
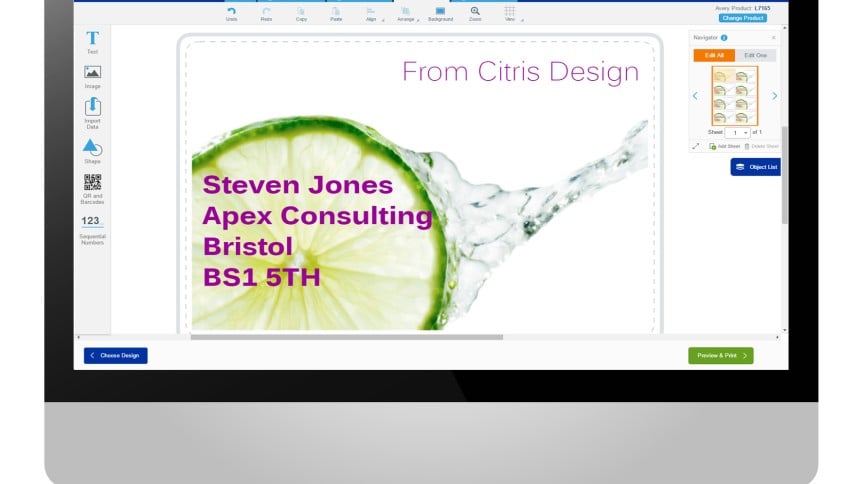
Well the answer is simple… On the right hand side of your page, above the page layout in our “Navigator” panel you will see two buttons: ‘edit one’ and ‘edit all’. If you click edit one, you can individually choose which label you would like to edit by selecting it.
If you are creating different labels/cards and would like to add a logo to all in the same place for example, you can switch to edit all, add the image and then switch back to edit one to continue editing individual labels.
Mail Merge: Step One
Many of you may not be aware of this genius tool. Mail Merge allows you to import data such as names and addresses and apply them to different labels in seconds.
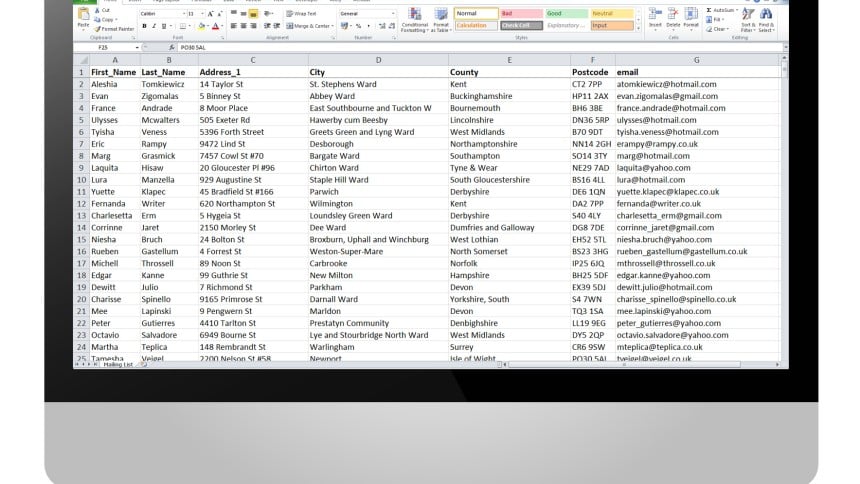
To be able to perform a mail merge in Design & Print, you need to have a compatible spreadsheet (excel, google sheets or .csv). In the spreadsheet, ’it's best to include a title row to giveeach of your data columns headings; for example, Name, Street, Town and Postcode in separate columns. Once you have filled all of this in, your spreadsheet is ready for your mail merge.
When you are happy with your list of addresses, and you have designed your label, simply add a text box onto the label and select the font style, size and colour.
When you are happy with the design of your label, on the left hand side, click on ‘import data’ and then ‘browse for file’ and select your spreadsheet from your documents.
Mail Merge: Step Two
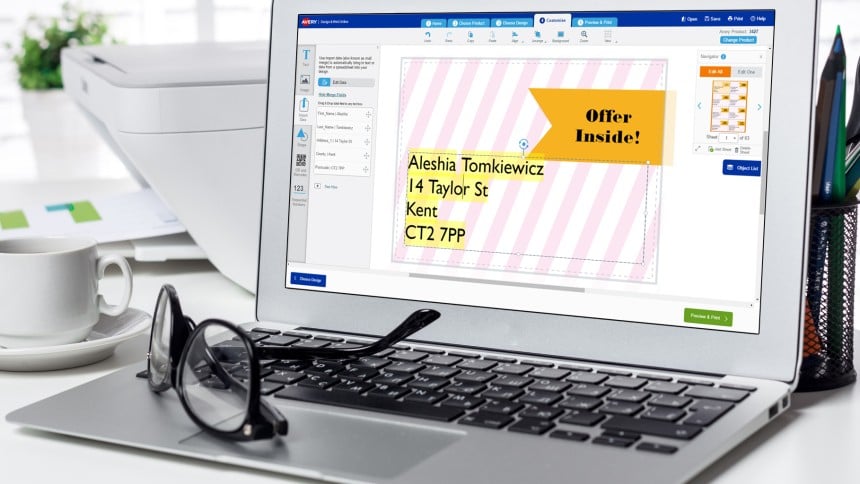
After you have selected your chosen spreadsheet, you will see it appear in the Mail Merge pop up box.. Make sure you deselect box number one so that your titles are not included in your merge. When you are happy with everything, click next and choose which order you would like your addresses to be in. You can do this by either dragging and dropping or double clicking on each one. You can also use the backspace and arrow keys on your keyboard to make sure the first names and last names are on the same line. When you are happy with the order, click “next” then “finish”.
You should now have all of your imported information on your Avery product.
Tip- If you want to edit one individually, don’t forget to use the ‘edit one’ and edit all’ buttons on the right hand side!
More help and guidance
We are very proud of our Design & Print online software and love sharing little tips and tricks with you to make your life as simple and quick as possible. We also have lots of videos available which show these steps in more detail. Have a look here.
If you need further information or have any questions at all, please do not hesitate to contact our customer service team who will be happy to help!